Showing posts with label Baking. Show all posts

Monday, June 10, 2013

Mango Muffins

Ingredients:-
  1. Fresh Mango Pureed or Kesar Mango Pulp - 3 cup
  2. All purpose flour/Maida - 3 Cups
  3. Baking Soda -¾tsp
  4. Baking powder - 1 tsp
  5. Eggs -2
  6. Butter - ½ cup
  7. Sugar - 1½ cup

Preparation Method:-
  • Pre-heat the oven in 350 Degree F. Line the muffin tray with liners and set aside.
  • Sift together all purpose flour, baking soda and baking powder or add them to a wide bowl and whisk well to combine.
  • Cream butter and sugar beating with a hand mixer/electric mixer for two-three minutes in medium speed.
  • Add in eggs and beat in medium speed till creamy.
  • Add in the flour mixture and mango puree little by little alternatly till everything is combined
  • Pour the batter to the muffin liners till 3/4th cup.
  • Bake for around 40-45 mins or till a sharp knife/cake tester inserted comes out clean.
  • Take out of the oven and let it cool
  • Serve with coffee/tea/breakfast/snack or whenever you crave for one :) 

Tuesday, January 15, 2013

Baking Partners Challenge #6: Apple Pie

For this month's baking challenge Swathi choose pies. We had a total of four recipes both sweet and savory recipes. The recipes were suggested by Gayathri of Gayathri's Cook Spot, Tamy of 3sides of crazy and  Samantha of Samantha Menzies. I baked apple pie recipe suggested by Gayathri of Gayathri's Cook Spot  which she choose from taste.com. Thanks Gayathri for the wonderful recipe, we really enjoyed it, especially the little one's. I made little changes here and there, omitted eggs in the crust, used less butter compared to the given recipe and used brown sugar for the filling. So friends try out this simple but delicious pie which I'm sure you'll fall in love for and bake again. Enjoy!!!!


How I made It:-
Ingredients
  • 2 1/4 cups (260g) plain flour(Original recipe calls for 1 3/4 cups (260g) plain flour +  1/2 cup (75g) self-raising flour)
  • 52 unsalted butter, chilled, cut into small pieces(Original recipe calls for 185g butter)
  • 1/3 cup (75g) caster sugar
  • 2 to 3 tbs milk
  • Demerara or caster sugar, to sprinkle
Filling
  • 4 large Granny Smith apples (Originally recipe calls for 8 count)
  • Lemon Juice - 2tbsp
  • Few Chopped dates(6-7count- optional, original recipe do not call for dates)
  • 45g unsalted butter
  • 1/2 cup (110g) brown sugar
  • 1 tsp Allspice


Step 1
Sift flours and a pinch of salt into a large mixing bowl. Add butter and rub lightly into flour with your fingertips. Lift mixture high above the bowl as you rub, to incorporate air into the pastry and make it lighter. Continue until mixture resembles fine breadcrumbs. Dissolve sugar in milk and mix well till it dissolve, pour this to the flour little by little and knead. Add bit more milk if required and knead into a smooth ball with your hands. Divide dough into two pieces, one slightly larger than the other. Wrap in plastic wrap, and chill for 30 minutes.

Step 2
To make the filling, peel and core the apples, and cut each into 8 pieces. Toss immediately with lemon juice in a large bowl, to prevent apples from discolouring. Place the butter and sugar in a large frypan over medium-low heat. When butter has melted, add apples and spices, then stir to coat. Cook, stirring occasionally, for 10 minutes or until apples have softened. Set aside to cool.

Step 3
Roll out the larger pastry ball on a floured workbench to a 30cm circle (about 2mm thick). Roll pastry around rolling pin, then unroll over a 22cm metal pie dish. Gently press into corners and allow excess to overhang. Place filling in base with a slotted spoon. Roll the small pastry piece to a 25cm circle. Beat an egg with milk, brushing some on rim of the base(I dint do this, since I didnt use egg at all). Top with small pastry.

Step 4
Lift the pie dish and cut excess pastry from edges with a sharp knife. Crimp edges of pastry together with your fingers. Chill for 30 minutes. Preheat oven to 180°C, place pie dish on a baking tray. Brush top of pie with more beaten egg(I didn't do egg wash), sprinkle with demerara or caster sugar. Cut four small air vents in the centre of the pie and bake for 45 minutes or until golden brown.

Linking this to Baking Partners started by Swathi of Zesty South Indian Kitchen
Check out the below linky tool to find what our baking partners are baking for the challenge

Wednesday, October 31, 2012

Pumpkin Chocolate Chip Muffins for Baking Partners # 3 and Halloween

Theme for this month's Baking Partner's Challenge was Muffins or Cupcakes with Pumpkin as star ingredient. Reshmi of Easy Cook, Priya of Cook Like Priya and Julie of Erivum Puliyumm suggested three recipes of muffins and cupcakes. I baked Pumpkin chocolate chips Muffin suggested by Reshmi from Joy of baking. They tasted way too good, very soft, moist and delicious. Kids here loved it. Try out these cupcakes to make the Halloween fun filled and interesting for your kids :-)


Ingredients Used:-


  1. 1½ cups (195 grams) all purpose flour
  2. 1 teaspoon baking soda
  3. 1 teaspoon ground cinnamon
  4. ¼ teaspoon ground ginger
  5. ¼ teaspoon ground cloves
  6. ¼ teaspoon freshly ground nutmeg
  7. ½ teaspoon salt
  8. ½ cup (113 grams) unsalted butter, room temperature
  9. 1 cup (200 grams) granulated white sugar
  10. 2 large eggs
  11. 1 teaspoon pure vanilla extract
  12. ¾ cup (180 ml) solid packed, canned pumpkin puree
  13. 1 cup (175 grams) semisweet chocolate chips

How I made It:-
  • Preheat oven to 350 degree F (177 degrees C).
  • Place rack in the middle of the oven. Line 12 muffin cups with paper liners or spray each cup with a non stick vegetable spray.
  • In a large bowl, sift together the flour, baking soda, ground spices, and salt.
  • In the bowl of your electric mixer, or with a hand mixer, cream the butter and sugar until light and fluffy.
  • Add the eggs, one at a time, beating well after each addition. Beat in the vanilla extract. Scrape down the sides of the bowl. 
  • With the mixer on low speed, alternately add the flour mixture and pumpkin puree, in three additions, beginning and ending with the flour mixture. Fold in the chocolate chips.
  • Fill the muffin cups evenly with the batter using two spoons or an ice cream scoop. Place in the oven and bake for about 18 - 20 minutes, or until firm to the touch and a toothpick inserted in the center of one of the muffins comes out clean. 
  • Take out and place on a wire rack to cool.
  • Makes 12 regular-sized muffins.
Note: The batter can be baked in a 9-inch (23 cm) loaf pan. Butter or spray the loaf pan with a non stick vegetable spray. Bake the loaf in a 350 degree F (177 degree C) oven for about 50-60 minutes or until a toothpick inserted in the center of the loaf comes out clean.

Wednesday, September 26, 2012

Ultimate Chocolate Cream Cheese Cookies ~ Baking Partners #2


Today's recipe is Ultimate chocolate cream cheese cookies, our second assignment for Baking partners - baking group started by Swathi . We were given three recipes of cookies from which we could choose any one or bake all the three. I obviously chose Chocolate Cream Cheese cookies, as my kids love the chocolate chip cookies. This recipe was suggested by our baking partner and  friend Tina, from baked owners Matt Lewis and Renato Poliafito. Thanks a lot Tina for this awesome recipe. It tasted delicious, rich, chewy and they literally melt in mouth.

As per the rule we are suppose to post the recipe on 15th of every month, but due to many reasons I was unable to bake or post them on the particular day. I apologize for being late dear Swathi and all my baking partners but I really missed baking along with you all and missed my dear space as well. Things have changed for me and family, as I started travelling for work, unlike before I'm cooking very less these days. But I'm glad that I could bake these cookies last weekend, which my kids absolutely loved. The shelf life of these cookies is said to be less, so I refrigerated the left overs in an air-tight container. I microwave them for few seconds say 30 secs just before I served them with a glass of milk for my little ones and it tasted just the same. So here is the recipe for Ultimate Chocolate Cream Cookies, bake them today and Enjoy!!!!

Ingredients:-
  • 2 ¼ cups (255g) all purpose flour
  •  ¼ cup (32g)  unsweetened cocoa powder
  • 2 tsp. (8g) baking soda
  • ½ tsp. (3g) salt
  • 2 sticks (226g) unsalted butter, softened slightly
  •  4 oz (113g) Cream Cheese at room temperature
  • 1 cup (201g) granulated sugar
  • ½ cup (110g) dark brown sugar
  •  2 large eggs
  • 2 Tbsp. (30ml) heavy cream(I used milk)
  • 1 tsp. (5ml) pure vanilla extract
  • 3 oz. (85g) bittersweet chocolate, melted and cooled
  • 8 oz. (225g) of semi-sweet chocolate chips
How I made It:-
  1. Preheat the oven to 350 degrees and line 2 baking sheets with parchment paper. 
  2. In a microwave safe bowl melt the bittersweet chocolate for 30 secs. Take it out and stir well, check if everything is melted and let it cool(If the chocolate is not melted fully, microwave again for 10 secs) 
  3. In a medium bowl, sift the flour with the cocoa powder, baking soda and salt. 
  4. In a bowl combine the butter, cream cheese, granulated sugar and brown sugar. Using a hand mixer or stand mixer beat them until fluffy, about 3 minutes. Scrape down the sides of the bowl. 
  5. Beat in the eggs, heavy cream(or milk) and vanilla until blended. At low speed, beat in the dry ingredients.  Add the melted chocolate and chocolate chips and beat just until incorporated.  Cover the bowl and refrigerate the dough for at least 15 minutes or up to 2 hours.(I kept it for 2 hrs).
  6. Scoop heaping tablespoons of cookie dough onto the prepared baking sheets, spacing them two inches apart. Bake for 12 minutes until the cookies are just set; shift the baking sheets for top to bottom and front to back half way through. 
  7. Let the cookies cool on the baking sheets for 5 minutes, then transfer them to a rack to cool completely. Serve with a cup of milk/tea/coffee.

Wednesday, August 15, 2012

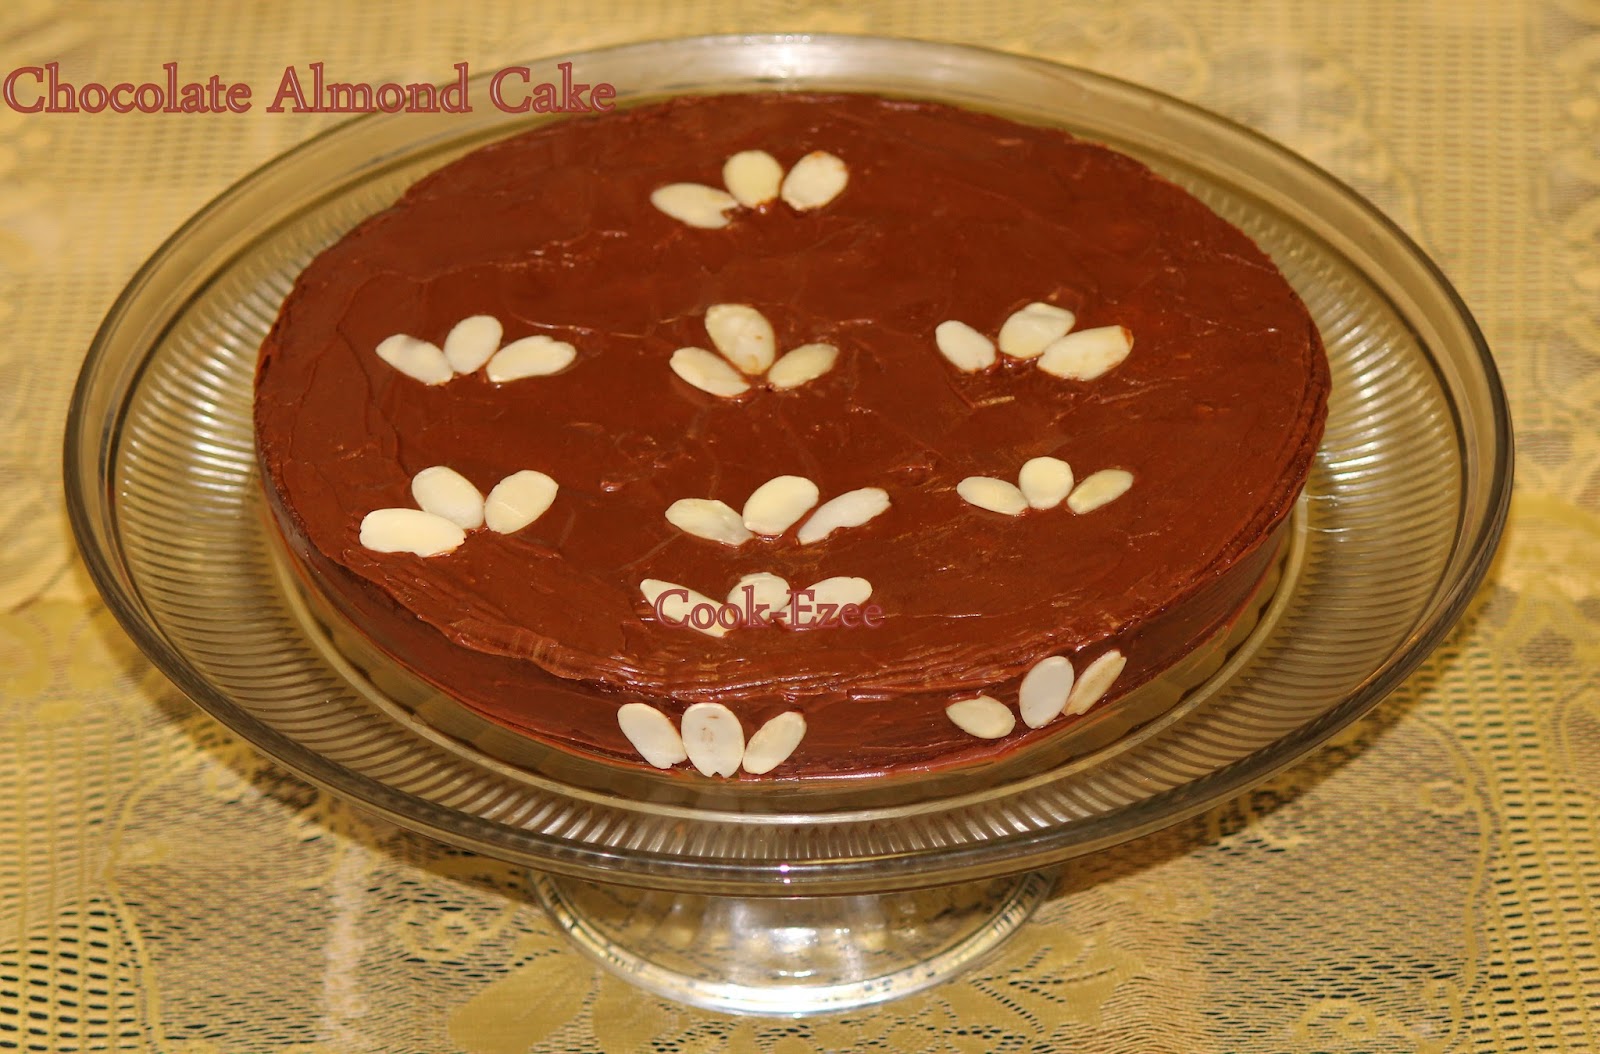
Reine de Saba avec Glaçage au Chocolat: Chocolate Almond Cake ~ Baking Partners # 1


We the Baking Partners along with you all celebrates the 100th birthday of Julia Child with her Wonderful Cake 'Reine de Saba avec Glaçage au Chocolat' or in simple words 'Chocolate Almond Cake' as a tribute to this Culinary legend. I truly believe in her quote's "You don't have to cook fancy or complicated masterpieces -- just good food from fresh ingredients". She is recognized for bringing French cuisine to the American public with her debut cookbook, Mastering the Art of French Cooking, and her subsequent television programs, the most notable of which was The French Chef.

I'm really happy and thankful to Swathi for choosing this awesome cake as our first assignment which I absolutely loved making and my family enjoyed every tiny bit of it. To be frank when I saw the recipe header it did scare me but when I went through the recipe thoroughly along with Swathi's Inputs and notes I felt there is nothing that I've to scratch my head. When I started making it I felt it is very simple and straight forward process, as for every bake you just have to pay proper attention. But I must thank all the wonderful ladies in our baking group who poured in with the suggestions and inputs after their bakes which made it more easier for many of us. Thanks a bunch girls, you guys are truly amazing.

Coming back to this cake, I felt its more fugdy kind, dense and moist. Very less flour is used in this cake and the almond meal(powdered/pulverized almond) added give it a rich texture which can be slurped even without any Icing.  The chocolate-butter Icing complimented the cake very well, I was delighted to see such a dense cake baked without using any enhancing agents like Baking Soda/baking powder. But just a word of caution at the end the calorie count in this cake may be high as it uses some generous amount of butter, but its worth every tiny bite. Now moving on to the recipe, though my final decoration is not great, it tasted fabulous!!!!!.


Ingredients Used for an 8" Cake Pan:-
  • Semi Sweet Chocolate - 4 ounce or 4 squares or113.4 grams 
  • Softened Butter - ¼  lb or 1 stick softened butter or 113g
  • Granulated Sugar - 2/3 cup/ 134g (add  ¼ cup mmore if you are on a sweeter side)  
  • Eggs - 3(Yolks and White Separated)
  • Pinch of salt
  • Almond extract  - ½ tsp. 
  • Cake flour - ½ cup or 57g(scooped and leveled, turned into a sifter)
  • Granulated sugar -  1 tbsp
  • 1/3 cup/ 65g pulverized  (ground) almonds(To pulverize almonds grind together Blanched or slivered Almonds with 1 tbsp of sugar)
Pulverized Almonds
Chocolate Icing:-
  • Semisweet Baking Chocolate -  2 Oz(2 squares)/ 56.7 g 
  • Rum or Coffee - 2 tbsp 
  • Unsalted butter - 5 to 6 tbsp

Directions:-
  • Preheat oven to 350F/ 180 C. Butter and flour the cake pan nd set aside.
  • Set the chocolate and rum or coffee in a small pan, cover and place (off heat-but boiling hot) in a larger pan of almost simmering water; let melt while you proceed with the recipe. 
  • Measure out the rest of the ingredients and keep handy.
  • Cream the butter and sugar together for several minutes until they form a pale yellow, fluffy mixture. Beat in the egg yolks until well blended.
  • Beat the egg whites and salt in a separate bowl until soft peaks are formed (gradually increase the speed of your mixer and for about 5 minutes); sprinkle on the sugar and beat until stiff peaks are formed (it should have peaks not deflate ones).
                       
  • With a rubber spatula, blend the melted chocolate into the butter and sugar mixture, then stir in the ground almonds, and almond extract. Immediately stir in one-fourth ( ¼) of the beaten egg whites to lighten the batter. 
  • Delicately fold in a third  (1/3rd) of the remaining whites and when partially blended, sift on one-third  ( 1/3rd) of the flour and continue folding. Alternate rapidly with more egg whites and more flour until all egg whites and flour are incorporated
  • Turn the batter into the cake pan, pushing the batter up to its rim with a rubber spatula. Bake in middle level of preheated oven for 25minutes. Cake is done when it has puffed, and 2 1/2 to 3 inches around the circumference are set so that a needle plunged  into that area comes out clean; the center should move slightly if the pan is shaken, and a needle comes out oily
  • Allow cake to cool in the pan for 10 minutes. Run a knife around the edge of the pan, and reverse cake on the rack. Allow it to cool for an hour or two, it must be thoroughly cold if it is to be iced.
  • To serve, use the chocolate-butter icing recipe below, and then press a design of almonds over the icing.
How to make Icing:-
  • Put a bowl filled with a tray of ice cubes and water to cover them and set aside.
  • Place the chocolate and rum or coffee in a small pan, cover, and set in a larger pan of almost simmering water(heat off-but boiled water).  
  • Remove pans from heat and let chocolate melt for 5 minutes or so, until perfectly smooth. Lift chocolate pan out of the hot water, and beat in the butter a tablespoon at a time. Then beat over the ice and water until chocolate mixture has cooled to spreading consistency. At once spread it over your cake with spatula or knife.
  • Garnish with slivered almonds or according to your choice.

Some important Tips and Notes:-
*   Substitution for cake flour:- Add 1 tablespoon of corn flour/corn starch and then fill the rest of cup with all purpose flour(I did this instead of using cake flour)
** Reserve ¼ cup or more slivered almonds for decoration 
*** The cake is done when a cake tester inserted at the sides comes out clean where as when inserted in the center comes out with few moist crumbs.
*** Check out for the cake from 18 minutes as the baking time can vary according to different oven settings.

Thursday, July 26, 2012

Baking Partners: New Baking Group Announcement


Baking Partners: A new Baking Group

A group of home bakers helping each other to achieve perfection.

Baking a home made Baking a homemade bread, cake or cookies will give the best outcome. However in order to achieve the best results, a perfect recipe and right techniques are required.

We are a small group of home baker friends, who love and want to learn more about the nook and corners of baking. We are planning to try out recipes from books/magazines and cooking shows. Every member gets a chance to present their choice of recipe and share important points with the rest of the group.

Main purpose of this group is to learn the techniques, critic the procedure if there are ways to improve, and to eat a delicious food.

Rules are simple, we will choose one recipe and send it out to the group by 16th of every month and the reveal date will be 15th of the next month. On that day we will blog about it. A linky tool will be open during that time and each member can link their post.

First month we are going to do a recipe, 2nd and 3rd month will be a theme and the 4th month
we will be back at a recipe. By doing in between recipes, we will able to learn more.

All enthusiastic bloggers interested in baking are welcome, please email Swathi at favoriterecipes12@gmail.com.

We will appreciate the use of logo or worded link that will help to spread the word. A bunch of thanks to Tina for designing this beautiful logo.
If you want to make it a gluten or vegan free diet, you can do those modifications also.

Baking Partners are
2.     Julie Erivum Puliyumm
3.     Tina  ( Pinay in Texas Cooking Corner)
4.     Priya (Priya's Versatile Recipes)  
5.     Suja ( Kitchen Corner Try It)
6.     Archana  ( Tangy Minds)
7.     Reshmi  ( EasY Cook)
8.     Prathibha ( Cook Ezee)   
9.     Priya R ( Cook Like Priya)
10.   Sweatha ( Tasty Curry leaf)
11.   Vidhya (  A Portion to Share)
12.   Usha Rao ( My Spicy Kitchen)
13.   Divya Prakash( Divya’s Culinary Journey)
14.   Swasthi Blank ( Swasthi The Health Freak)
15.   Sanoli Ghosh ( Sanoli’s Kitchen)
16.   Pam Capone ( Live Ranch Delux)
17.   Mirellie( Gourmet Global Creations)
18.   Reshwani( Daily Cuppa)
19.   Peachy  (Peach Kitchen)
21.   Lorraine ( Joy’s Misadventures)
22.   Jayasri(Samyalarai)
23.   Sowmya(Nivedhanam)
24.   Anuja ( Simple Baking)
25.   Janani(www.redchillycurry.com)
26.   Ivy (Kopipaste)
27.  Janaki ( Janakidiary)
       And
       29 . Swathi ( Zesty South Indian Kitchen)    Creator and Owner

Monday, October 31, 2011

Witches finger cookies baked for halloween-Spooky spooky

These witch finger cookies are simple cookies that I baked for this Halloween. We had a friends gathering and Halloween party over the Halloween weekend and I was suppose to make some snacks and any goodies of my choice. Since it was Halloween I wanted to give some creepy spooky effect for the dish I make and I found this recipe in Allrecipes website. After reading the recipe I knew it is a very basic simple cookie and thought of giving it a try. But must say I was a lot worried about the shape because I haven't done anything like this before and  it is just hand made and there is no cookie cutter way of making it. I decided to give it a try and planned moulding it into simple cookies if the finger cookie shape didn't work. Thankfully it came out good and I was really happy to take this for our Halloween party.

Blanched almonds act as the fingernails for this cookie and I used red food decorator writer to give the blood effect around the nails. Some almonds came off from the baked cookies, I just dipped them in jam and fixed it back on to the cookie. This helped me to keep them in-tact. So let me add this recipe for this cute scary witch finger cookies. Enjoy!!!


Ingredients:-

All purpose flour/Maida - 2 cups
Confectioner's Sugar - 3/4 cup(add or reduce according to ur taste)
Softened Butter - 1/2 cup(Not melted butter please)
Milk - 1/2 cup
Egg - 1
Baking powder - 1/2 tsp
Salt -1/2 tsp
Whole Almonds - 1/2 cup(Soak almond in water for 15 mins and peel off the skin)
Vanilla extract - 1 tsp
Red food decorator writer/color gel - 1

Preparation Method:-
  • Sift together flour, baking powder, salt into a wide mixing bowl. Add sugar to this and mix with clean hands or spoon to remove lumps if any in the sugar. 
  • To the above dry mix add butter, egg, vanilla extract and knead well with your hands to make a smooth dough.
  • Add milk little by little to the mix if it is dry till you get a smooth dough. You might need to add/reduce the quantity of the milk I mentioned.(You can do this process in a food processor as well which will make your task easier)                                 
  • Cover and refrigerate the dough for 30-45 mins.
  • Pre-heat the oven to 325 degree Fahrenheit. Layer a cookie sheet with parchment paper and set aside.
  • Take out the dough from the refrigerator and make small cherry size balls. Roll each balls lengthwise with your hands on clean kitchen counter top to look like fingers. 
  • Now press one almond each at the end of the dough finger for the fingernail. Place them in the lined cookie sheet
                                           
  • With a knife make three crosswise slits in the middle and two slits in the front of the dough finger.


  • Press and work with your fingers on the middle and front part(place before the slits) to give a push up effect as of the real fingers(optional) 
  • Bake for 20 mins or until slightly browned. Remove from the oven and let it cool down completely.
  • Now with decorator writer, draw around the almond nails to give a blood effect(you can use color gel as well)
  • If the almond comes out of the cookie dip them in any jam and press them back again. 
  • Scary witch finger cookies are ready..
                                            
                           
Sending this to the event hosted by Sravani of Srav's Culinary Concepts "CC Festive Food"


Friday, September 30, 2011

Apple Crisp(Crumble)

Apple Crisp/Crumble is a simple baked dessert with a s very nice crisp and crumble topping with tender apple bites inside. The combination of oats, apple and Brown sugar tries to give it a healthy way and if served with a scoop of vanilla ice cream or whipped cream it is really delicious.

Apple Crisp was made since I had some fresh farm picked Golden Apples. This is been in my draft from quite sometime and thanks to Ramya of Ramyasrecipe for hosting the 'A for  Apple' event. I posted my Apple cake recipe for the event and told her I will try to post the apple crisp recipe if possible. This might be a late entry for the event but at-least it got  relieved from the draft, my apple crisp was bored sitting in the draft :)


Ingredients:-
  1. All purpose flour - 1/2 cup
  2. Brown Sugar(Or white sugar) -1/2 cup
  3. Cinnamon powder -1/2 tsp
  4. Salt a pinch
  5. Softened Butter - 3/4 cup(do not use melted butter)
  6. Old fashioned Oats - 1/3 cup
  7. Chopped walnuts/ pecans/almonds - 1/4 cup(optional)
  8. Chopped apple chunks - 6 cups(I didn't peel off the skin of the apple)
  9. Lemon Juice - 1/2 tsp
  10. Brown Sugar - 3 tbsp
Preparation Method:-
  • Preheat the oven to 350 Degree F. Grease a baking tray and set aside.
  • Mix all the ingredients from 1 to 7 with your fingertips or process in a food processor until the mixture is crumbly. Set aside
  • In another bowl put chopped apples, brown sugar, lemon juice and toss lightly
  • Put the apple-mix in the greased bake-ware and spread the topping evenly over the apples.
  • Bake for around 35-40 minutes until the topping is golden brown.
  • Remove from the oven and let it cool for sometime say 30 mins.
  • Serve warm or with a scoop of Vanilla Ice cream or whipped cream. Enjoy!!!!!!
I am sending this to Ramyasrecipe's 'A for Apple' Event. Happy Cooking. 

Saturday, September 24, 2011

Baked Ravioli in fresh homemade tomato sauce

Normally I run to Costco shopping after dropping my son to pre-school as those are the few hours I can shop peacefully since I have to manage only my daughter while I shop. Last weekend I ran out of milk and did not want to drive to Costco since I had a lot of house cleaning and chores to be done. So I asked my husband to go to Costco and he took my son along with him so that things can be a bit easy for me. Costco always have some demo food in progress and my husband came back with this frozen four cheese ravioli saying they had the demo and our son really loved it.

Next day I wanted to make this Ravioli for my son before he is back from school, but did not have any ready made pasta sauce but yea I had a lot of very fresh farm picked tomatoes which I really wanted use liberally to make something good. So I planned to use it to make some fresh tomato sauce and it resulted in a better sauce than the store bought ones. You can use the same with pastas as well, just make the tomato sauce at home instead buying it.  So friends this is my way of making the four cheese ravioli with fresh Tomato sauce. Enjoy!!!!


Ingredients:-
  1. Frozen four cheese ravioli - 25 nos(or as needed)
  2. Olive oil - 2 tbsp
  3. Onion finely chopped - 1 big
  4. Tomatoes finely chopped - 2 big
  5. Garlic minced - 4 cloves
  6. Pepper powder - 2 tsp
  7. Salt as needed 
  8. Dry basil leaves - 2 tsp
  9. Shredded Mozzarella cheese -3/4 cup
  10. Water required to cook Ravioli
Preparation Method:-
  • Preheat the oven to 350 degree Fahrenheit.
  • In a large pan bring water to boil, add some salt and cook the ravioli just till ravioli float on top of the water(no need to cook it till tender since it will continue to cook in oven)
  • Drain the ravioli and set aside
  • Heat up a pan in medium heat, add olive oil, add onion and garlic and saute for a while. Add pepper, salt and basil leaves and stir well. Add the chopped tomatoes, stir well. When the sauce starts to boil reduce the flame to low-med and cook breaking the tomatoes, stirring occasionally until sauce reduces and thicken. Switch off the flame.
  • Grease a baking dish, layer with some ravioli topped with tomato sauce and shredded cheese.
  • Repeat layering with rest of ravioli, sauce and cheese. Spread some extra cheese on top if desired :)
  • Bake for 20-25 mins or until golden color on top. Take out of the oven and let it cool for a while.
  • Serve warm. Enjoy!!!!!
Notes:-
1. You can use any shredded cheese or cheese blend available in your kitchen.
2. If you have dry parsley leaves you can add 1 tsp of it along with dry basil laves while making the sauce. 
3. You can make this tomato sauce in bulk and keep this refrigerated for at least a month and use for any pasta of your choice. 


Friday, September 16, 2011

Peach Raisin Cobbler

So guys, I did not have any intention to bake anything this morning, just happened to go through a Peach recipe while I was planning to use my fresh farm picked juicy peaches. We had been to one of a favorite farm near our home known as Larriland farm where we get to have lot of fresh organic apples, peaches, blackberries and various other veggies and fruits. One of the great privilege we get in summer are these farm visits and my kids also enjoys it. These farm picked fruits just tastes awesome compared to the store bought one's. But we pick them a lot that in a day or two I start thinking what to do to finish these off, because organic fruits do not stay long even when kept inside the fridge. I was looking in Costco cook book one of my friend gave me long back and found this recipe in it. I have to admit I have adapted the recipe fully from it because it was so simple and ezee recipe and I did not find any reason to make any changes though I have made very minor changes in the list of ingredients.


Ingredients:-
  1. All purpose flour -1 cup
  2. Milk- 1 cup
  3. Raisins - 1/2 cup
  4. Peach - 3 or 4(sliced, I did not peel off the skin)
  5. Butter - 1/2 cup
  6. Baking powder - 1 tsp
  7. A pinch of salt(1/4 tsp)
  8. Brown sugar -  3 tbsp
  9. Ground all spice - 1/4 tsp(optional)
  10. Ground Cinnamon - 1 tsp
Preparation Method :-
  • Pre-heat the oven to 350 degree F.
  • In large bowl, combine sugar, flour, baking powder, salt and mix well.
  • Pour milk and butter in the flour mix and stir with a spoon well to form a lump free batter.
  • Grease a pan and pour the batter into the pan.
  • In another bowl, combine peaches, raisins, brown sugar, cinnamon powder, all spice and toss to coat evenly.
  • Spoon the peach mixture evenly over the batter
  • Bake for 45 minutes or until lightly brown(or a tester passed inside comes out clean)
  • Serve warm or at room temperature with Ice cream if desired.


Recipe Courtesy:- In the kitchen The Costco Way

Note:- This tasted awesome but i felt the raisins that passed inside the batter were sweet and awesome compared to the raisins that was on top of the cobbler. So my suggestion would be instead of spreading raisins on top of the peaches drop raisins first on top of the batter and put peaches on top so that you get to have nice raisins bites as well...

Now lemme post some pics from the farm, sorry don't hav any pics of just fruits. Have some of my kids picture in the farm..


Thursday, August 25, 2011

Molten Lava Cake

Molten Lava Cakes or chocolate lava cakes are so ezee to make and taste just like the one's you get it in any fancy restaurant. This is a flourless cake(some use 1/2 cup flour though) which can be made with just 4 ingredients, butter, chocolate, sugar and eggs. If baked perfect it gives you a firm texture outside but will be runny(lava) inside. I believe there is no point in making a lava cake without the lava inside, but still I've seen some people baking it for few more mins to make it firm inside as well as they don't like it runny. Would again say it is all personal choice :). Serve this darling lava cake with a scoop of vanilla ice-cream or whip cream or a dash of powdered sugar, it is a heavenly treat!!!!


Ingredients:-

  1. Butter - 1/2 cup(1 stick)
  2. Chocolate - 4 oz semi sweet dark chocolate + 2 oz milk chocolate
  3. Sugar - 3/4 cup + 2 tbsp
  4. Eggs - 3 large(separate it into two bowls)
Preparation Method:-
  • Pre-heat the oven to 400 degree Fahrenheit. Grease four ramekins or custard bowl and set aside.
  • In a pan add the chocolate and butter and melt it use double boiling method. The butter will melt soon and you can melt the chocolate in that heat by slowing stirring the chocolate in butter. (or microwaveable it in a covered for 1 min) 
  •    In a bowl add sugar and eggyoks and beat it in high till they are creamy.
  • Add the chocolate-butter mixture to the beaten egg york mix and stir gently to mix everything well.
  • Beat egg whites with 2 tbsp of sugar till it is firm and whipped well

  •  Fold in the egg whites gently with chocolate mixture and mix till everything mixes evenly.
  • Pour the mixture to the greased ramekins and bake for 7-9 mins till the outside is firm and inside is runny. Take out and set aside to cool down but not fully.
  • Place a plate on top and turn it upside down slowly, with you hands hit gently on top of the ramekins so that the cake comes out pan clean.
  • Serve warm with a scoop of vanilla icecream or whipped cream. Enjoy!!!!

Tuesday, August 9, 2011

Butter Almond Cookie

Cookies are kids all time favourite. My son often ask me 'Amma, what are you gonna make for me today??? Can you make me some cookies or may be some cupcakes Ammaaa '. And every time my answer is 'no dear'. As every mom I have been trying to build some healthy eating habits in my children. Trying to make them eat more veggies, fruits, dairy products, fish, eggs, less meat and carbohydrates so and so and so...

But then sometimes I think, even we grown ups make reasons while eating some of the unhealthy food may be like cookies, cakes or any extra calorie food at home, work or at any party. Then why don't kids have some fun in eating those freshly baked yummy cookies rather than the store bought snacks. So when my son insisted I thought of baking some Almond cookies and the result came out be nice soft, cream colored yummy cookies. Friends, try to bake them at home and I'm sure you will stop picking cookies from the stores.
Following is my version of Almond cookies which I have adapted from Pillsbury.


Ingredients:-

All purpose flour - 1 1/2 cup
Butter - 1/2 cup
Baking soda - 1 tsp
Salt - a pinch
Sugar - 3/4 cup
Egg - 1
Almond extract -  1 tsp
Almonds - 15(or as required for the number of cookies you are gonna bake)

Preparation Method :-

  • Pre-heat the oven to 350 degree F.
  • Sift together flour, baking soda, salt. Set aside.
  • Line a cookie sheet with a parchment paper and set aside.
  • In a large bowl beat togther sugar and butter till soft peaks form. Add the egg and beat again till creamy.
  • Add almond extract and mix. Add the flour mixture and mix well till it becomes a smooth dough (either do it with your hand or use dough hooks once you add the flour mixture and beat in medium speed)
  • Refridgerate for atleast 2 hours
  • Take out from the fridge and make small balls by rolling them under your palm.
  • Gently press one almond each on each dough balls and place it on the lined cookie sheet 2 inches apart.
  • Bake till done for 12-15 mins or till they are crispy outside and soft inside. Let it cool
  • Cookie stays fresh for a week in an air tight container kept outside.(If and only if you kids let it stay that long :-) )


Wednesday, July 13, 2011

Apple-Nuts cake with caramel topping


Ingredients:-


All purpose flour - 2 cups
Baking Pdr - 1 tsp
Salt - a pinch
Cinnamon pdr - 2 tsp
Oil - 1 cup
Butter - 1/2 cup
Eggs- 2 large
Sugar - 1 1/2 cups
Organic Apple - 2 Med size(chopped into small cubes)
Chopped Nuts - 1 cup( i used chopped cashews and Almonds)
Pure Vanilla Extract - 1 tsp

Preparation Method:-

1) Preheat oven to 350 degrees F. Grease and flour a baking pan, set aside.
2) Take a bowl and sift together flour, cinnamon powder, baking powder, salt and set aside.
3) In a mixing bowl whisk together the vegetable oil, butter, sugar, and eggs till lemon yellow.
4) Gradually add in the flour mix and mix until just incorporated.
5) Add apples, mixed nuts to the batter, mix to combine.(u can add milk if the batter is thick)
6) Pour batter into prepared pan, and bake until a tooth pick or a cake tester inserted in the center comes out clean (40-50 mins)


7) Remove from oven, and move to a cooling rack. Pierce all over the cake gently with a fork. Pour hot Caramel(Recipe follows) over the cake and top it with slices of Apple.
8) Serve warm or at room temperature.


For Caramel Topping:-

4 tbsp light brown sugar
1/4 cup skim milk(u can use any milk)
1/4 cup butter
1 tsp vanilla extract

In a pan add brown sugar, milk and butter and bring into boil by stirring in med flame. Stir for 3-4 mins till it become little thick like a syrup. Switch off the flame and add vanilla and mix well. Pour over the cake...
Related Posts Plugin for WordPress, Blogger...